
What if you could chain AI tasks together and run them with a single click?
Flows is Ritemark's visual workflow editor. Instead of running prompts one at a time in the chat, you build a diagram that executes automatically. Create a workflow once, run it whenever you need fresh content.
Opening Flows
Click the Flows icon in the Activity Bar (the vertical bar on the left side of Ritemark). This opens the Flows panel where you manage your workflows.
To create a new workflow, click New Flow at the top of the panel. Give it a name that describes what it does.
Understanding Nodes
Flows are built from nodes. Each node does one thing, and you connect them to create a sequence.
Trigger Node
Every flow starts with a Trigger. This is where you define input variables that the rest of the flow can use.
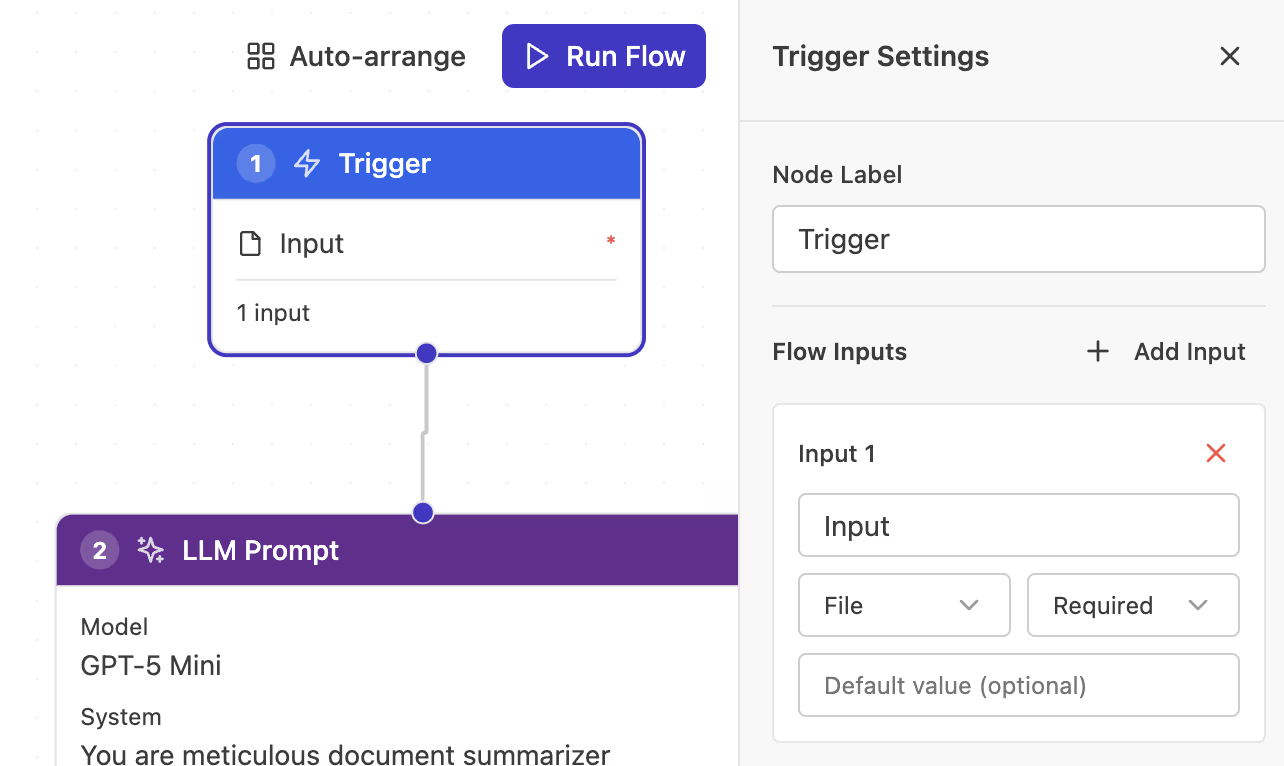 The Trigger node with an input variable defined
Click Add Input to create a variable. Give it a name like topic or document. When you run the flow, you'll be prompted to enter values for these inputs.
LLM Prompt Node
The LLM node sends a prompt to OpenAI or Google Gemini, using your own API key, and outputs the generated text.
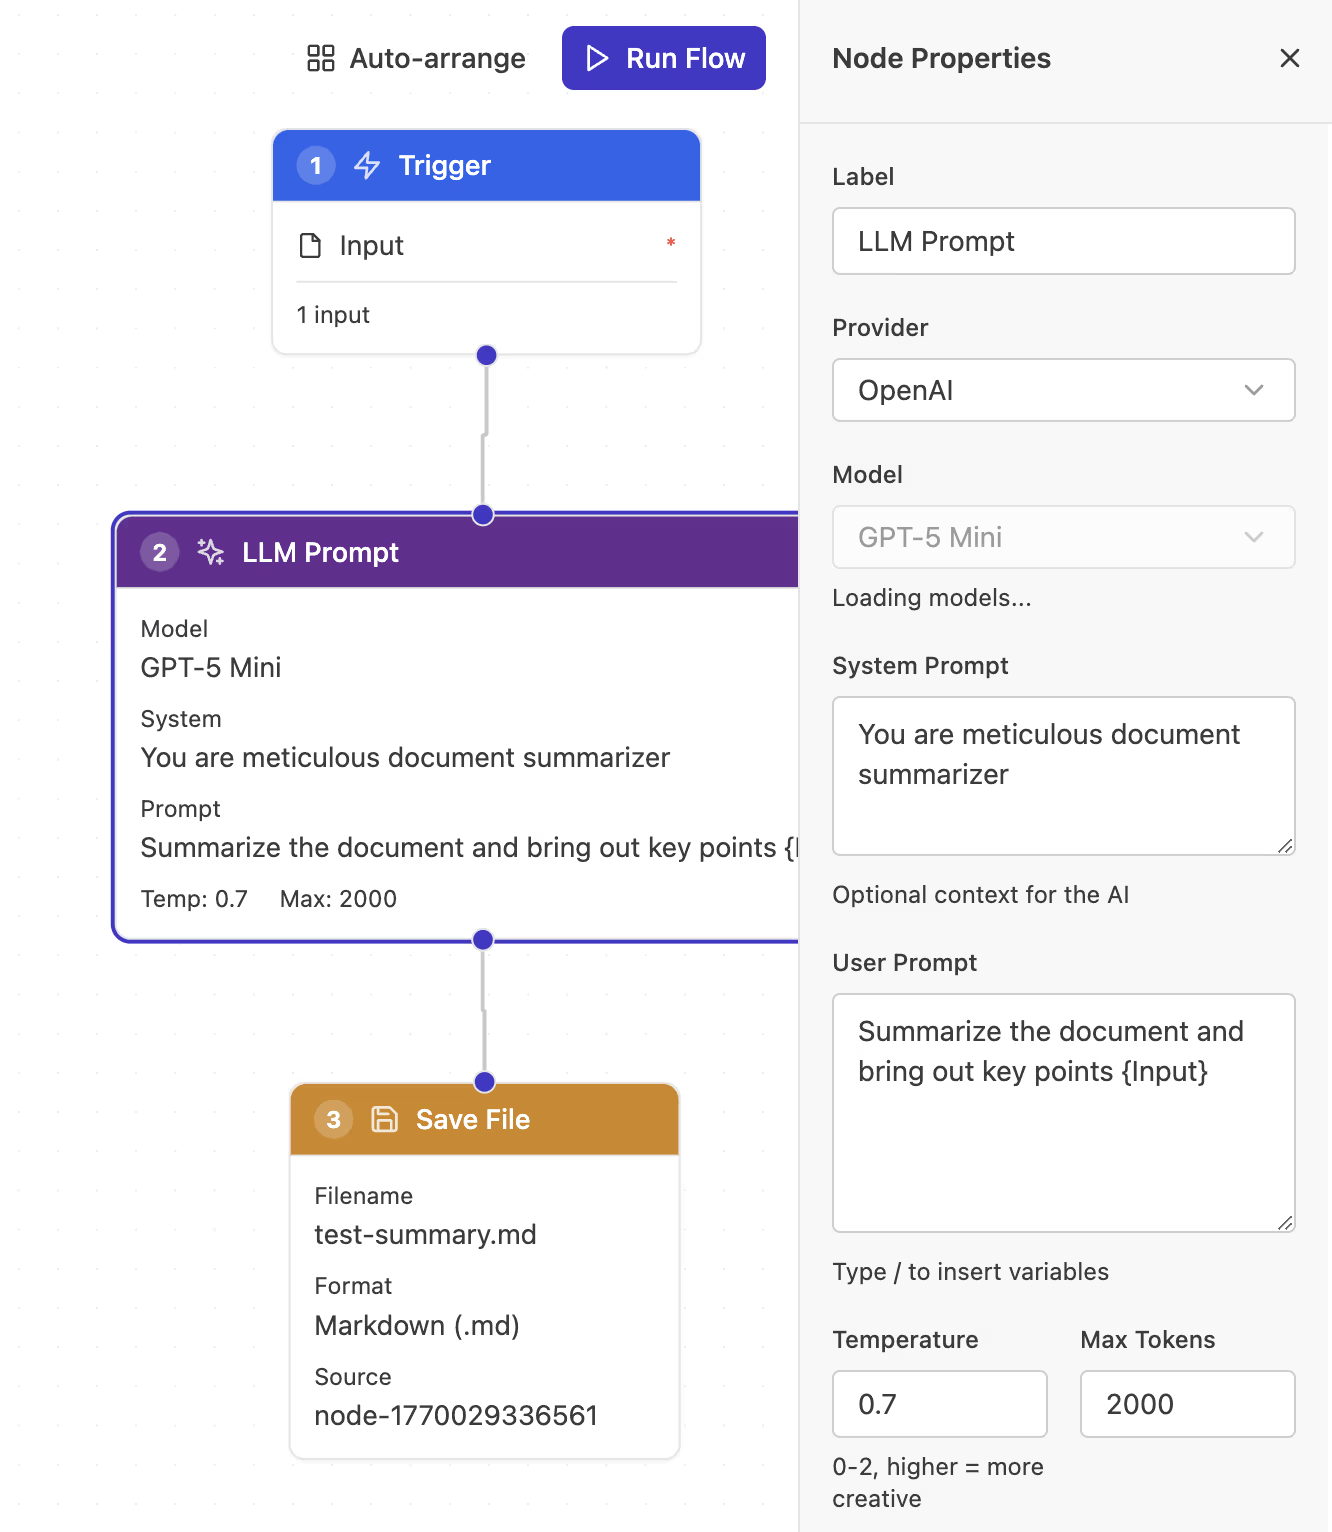 The LLM node configured with a system prompt and user prompt
Configure it with:
- Model: Which OpenAI or Gemini model to use
- System Prompt: Sets the AI's behavior and role
- User Prompt: The actual request (can include variables)
Use double curly braces to reference variables: {{topic}} inserts the topic from your Trigger node.
Image Generation Node
Creates images with the OpenAI or Google image model you choose on the node.
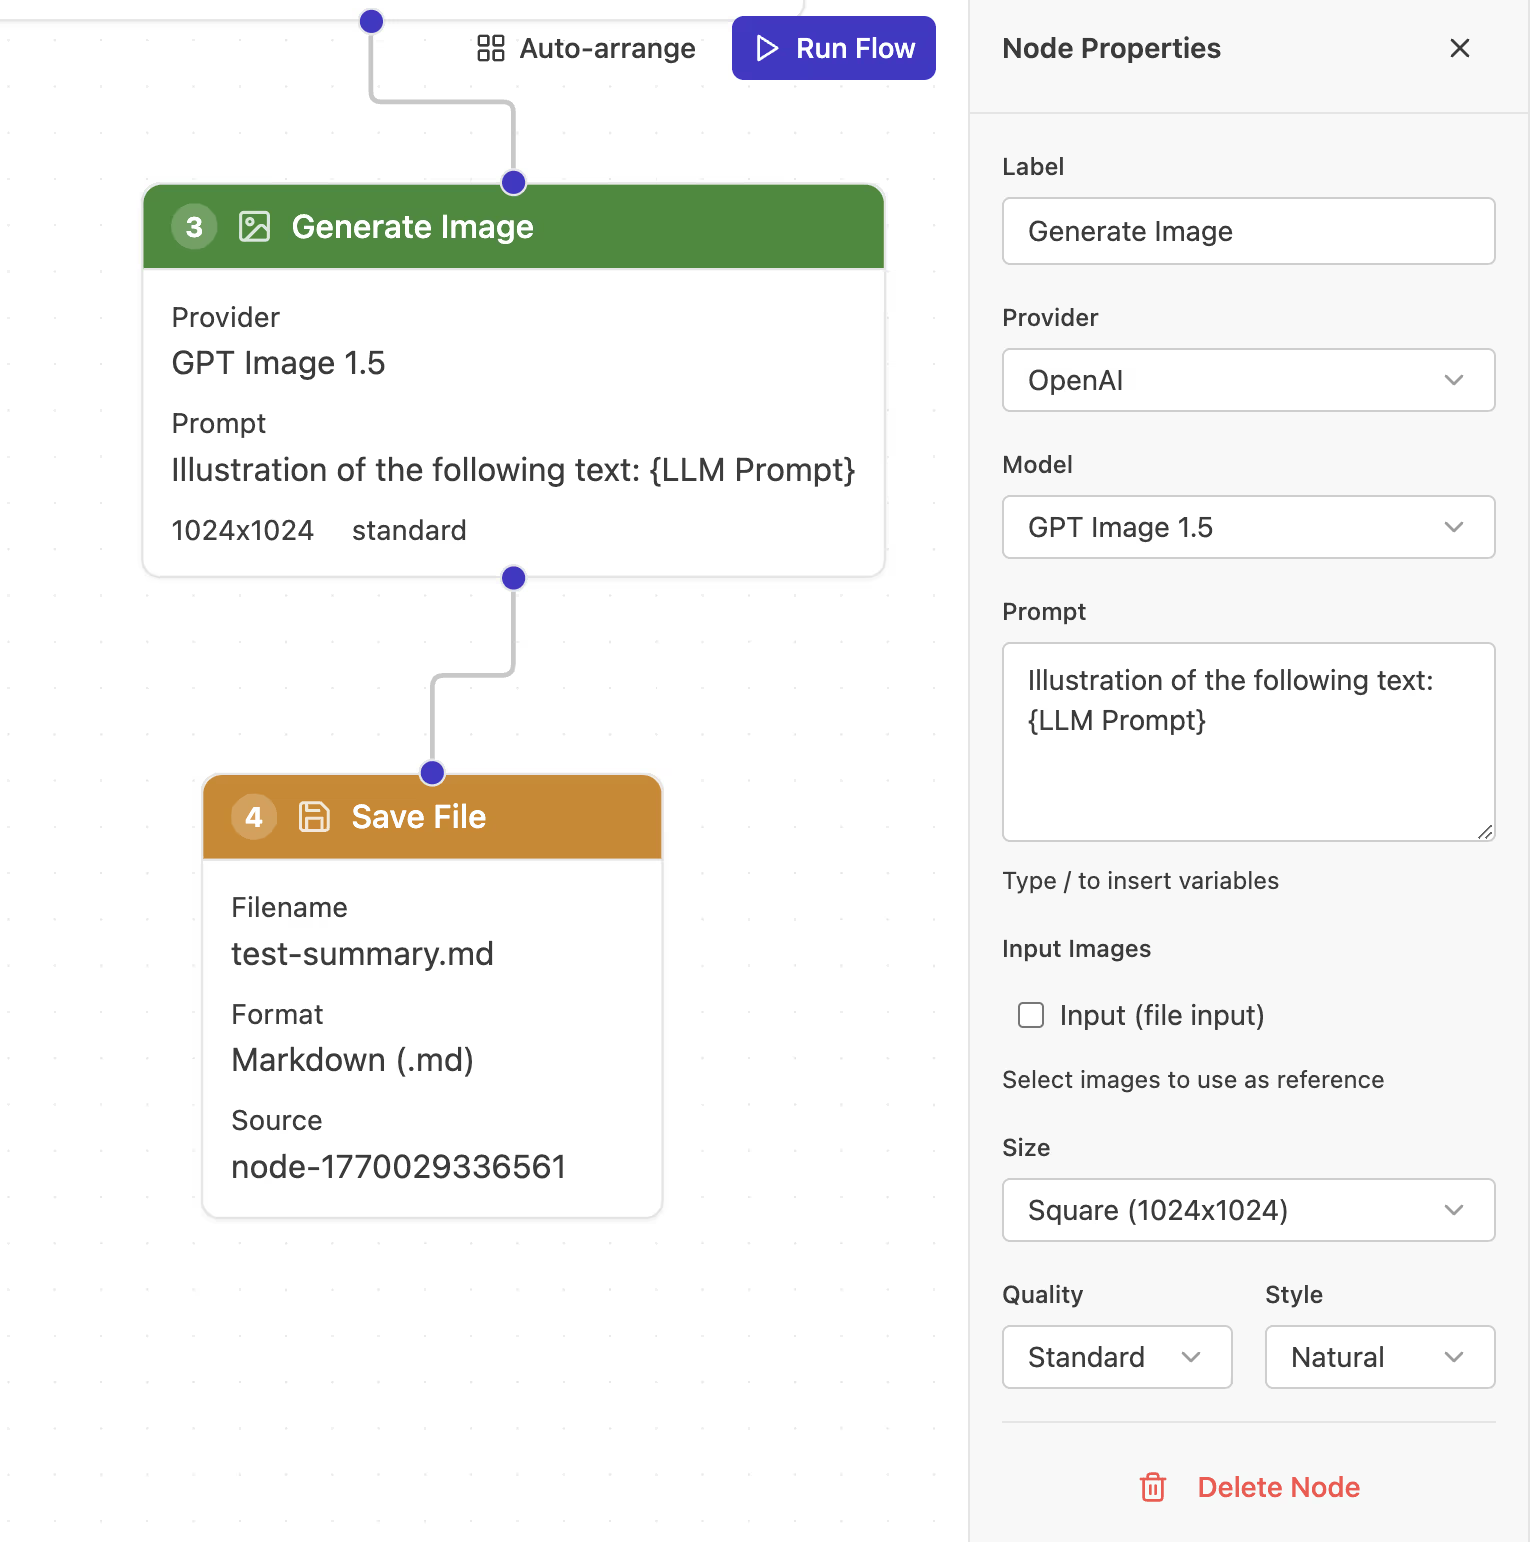 The Image node configured to generate an illustration
The prompt can reference text from previous nodes, so you can generate images based on AI-written descriptions.
In the node's settings you choose the provider, OpenAI or Google Gemini, and the model. As of v1.11.0, a new image node uses GPT Image 2 by default, or Gemini 3.1 Flash Image with the Google Gemini provider.
If a saved Flow uses a model Ritemark no longer offers, the Model field shows it as Unavailable with the message Saved model is no longer available. Choose a replacement. Pick one of the current models from the list.
Save File Node
Writes content to a file in your folder.
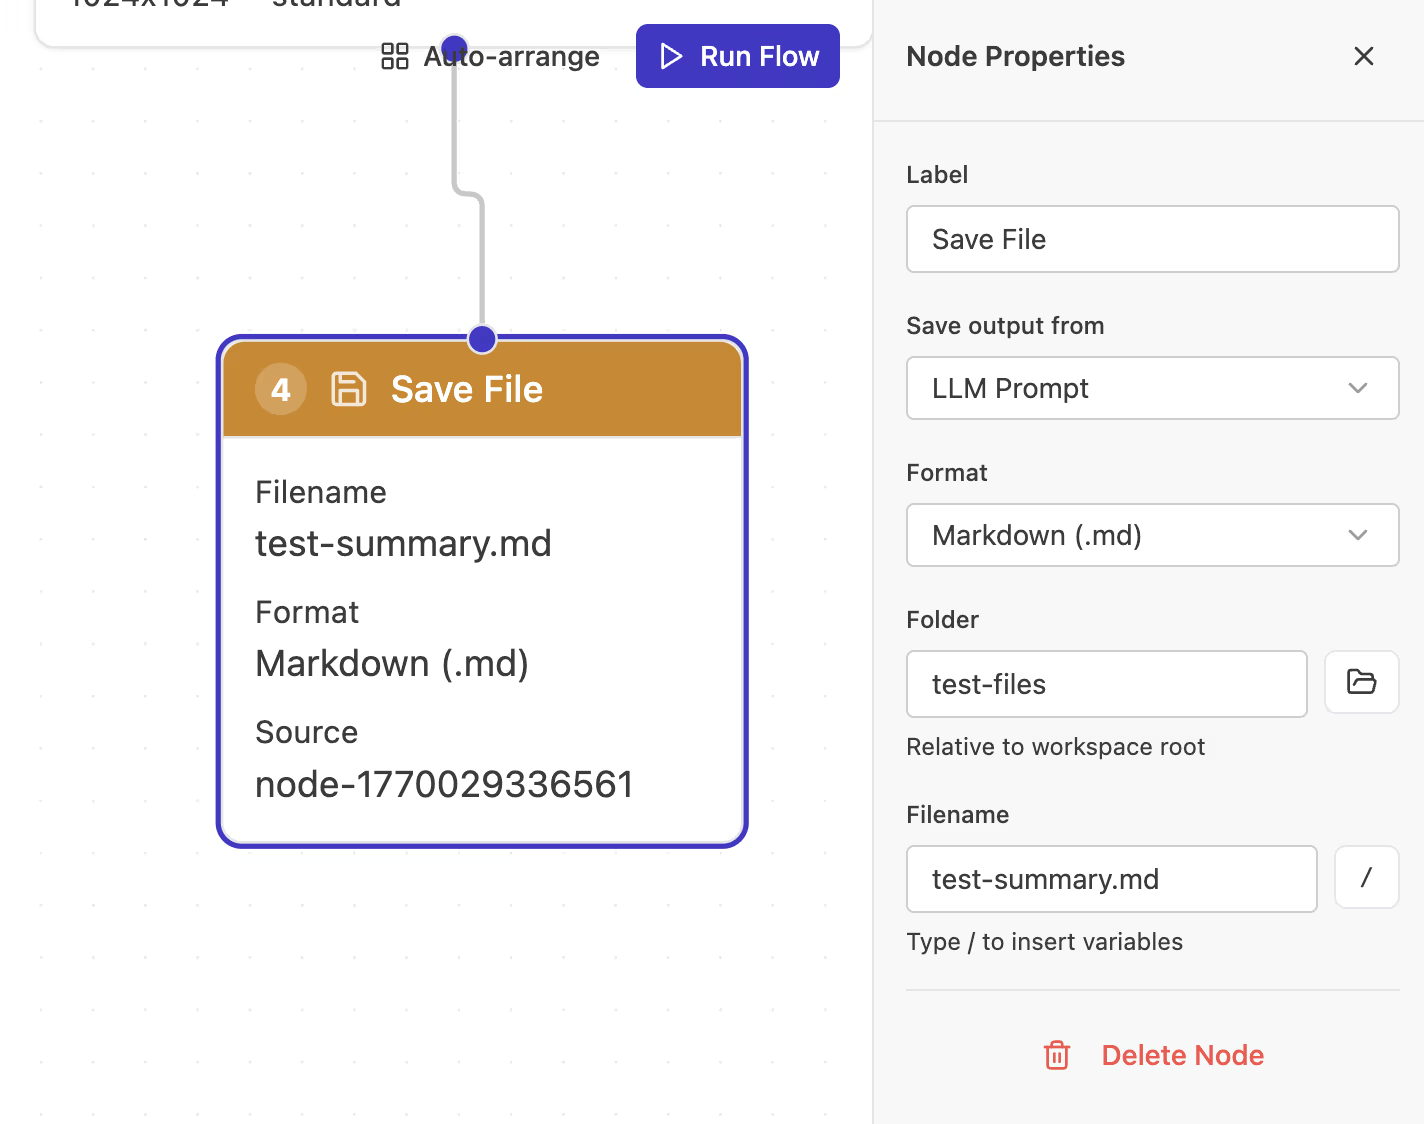 The Save File node configured to output markdown
Choose the folder, filename, and format (markdown, CSV, or image). The content comes from a connected node.
Claude Code Node
The Claude Code node is different from the other nodes. Instead of sending a single prompt and receiving a single response, it launches an autonomous AI agent that can read files, reason through complex problems, and produce structured output.
 The Claude Code node in the Flows editor -- agentic automation, visual style
Configure it with a Task field that describes what you want the agent to accomplish. The task can reference variables from upstream nodes using double curly braces, just like the LLM node. For example: "Analyze {{filename}} and identify the three key findings."
The Claude Code node uses the Claude Code that ships inside Ritemark and the same sign-in as the AI sidebar, so it needs a paid Claude plan or an Anthropic API key and no separate install. This is separate from the OpenAI or Google key used by LLM and Image nodes. See our Set Up Claude Code guide for sign-in steps, or read the full Claude Code Node article for detailed configuration and workflow examples.
Building Your First Flow
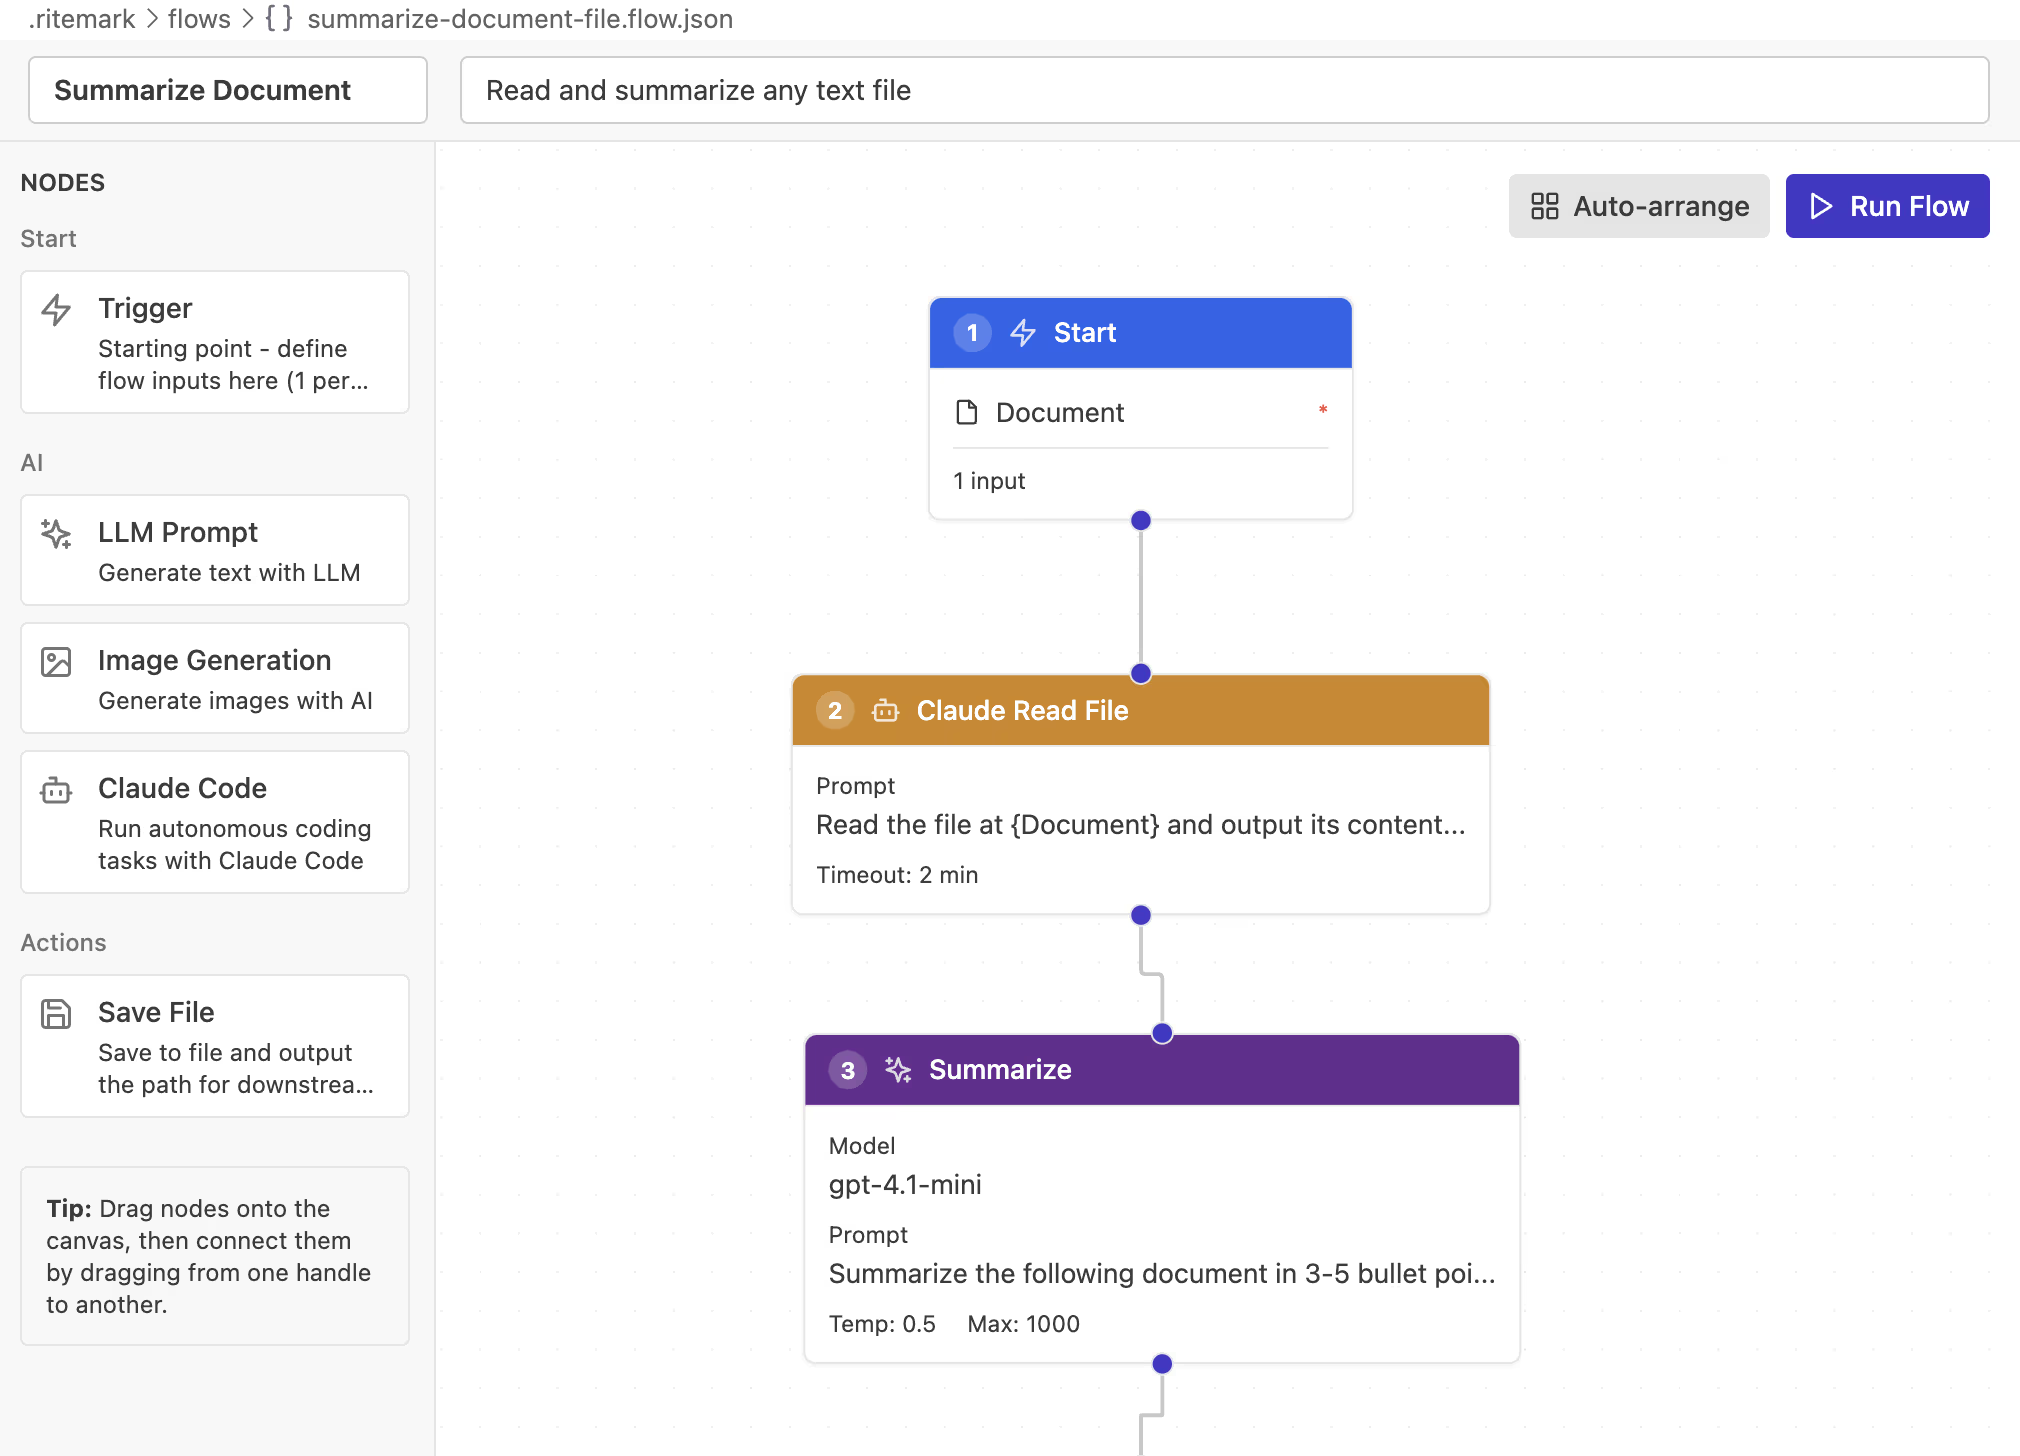
Here's how to create a simple document summarizer:
Start by dragging a Trigger node onto the canvas. Add an input called document with type "File". This lets you select a file when running the flow.
Next, add an LLM Prompt node. Connect the Trigger's output to the LLM's input by dragging between the handles. Configure the LLM with a system prompt like "You are a document summarizer" and a user prompt like "Summarize this: {{document}}".
Finally, add a Save File node. Connect the LLM's output to it. Set the filename to summary.md and format to Markdown.
Click Run Flow, select a document, and watch the summary appear in your folder.
Success: You've just built your first workflow. The same pattern works for any multi-step AI task.
Running Flows
Click Run Flow in the toolbar. If your Trigger has inputs without default values, you'll be prompted to enter them.
The execution panel shows real-time progress:
- Which node is currently running
- Output from completed nodes
- Any errors that occur
- Total execution time
Each node makes API calls, so complex flows take longer. Image generation is slower than text generation.
Tips for Better Flows
Start simple. Build a 3-node flow (Trigger, LLM, Save File) before attempting complex workflows. Make sure each piece works before adding more.
Use descriptive names. Name your variables clearly: blog_topic is better than t. Future you will thank present you.
Test incrementally. Run your flow after adding each node. It's easier to debug when you know which step failed.
Use Auto-arrange. Click the layout button to automatically organize messy node arrangements.
Configuring API Keys
Flows uses different providers depending on the node type. LLM and Image nodes use your own OpenAI or Google AI API key. The Claude Code node uses your Claude sign-in or an Anthropic API key, and the Codex node uses your ChatGPT sign-in.
To configure your OpenAI or Google AI key, open Settings and paste it into the matching field. For the OpenAI key you can also open Command Palette with Cmd+Shift+P and run "Ritemark: Configure OpenAI API Key". You can also access settings from the gear icon in the Flows sidebar.
For the Claude Code node, sign in to Claude in the AI sidebar or in Settings -> Claude Account, or add an Anthropic API key there. See Set Up Claude Code for detailed instructions.
Where Flows Are Saved
Your workflows live in .ritemark/flows/ inside your folder. Each flow is a JSON file containing node definitions, connections, and configurations.
You can share flows by copying these files. Others can place them in their own .ritemark/flows/ folder to use them.
Troubleshooting
Flow won't run: Check that all nodes are connected (no orphaned nodes), the Trigger node is present, and your OpenAI API key is configured.
LLM returns error: Verify your API key is valid and you have available credits. Review your prompt for issues.
Image generation fails: Image models can require specific API access. Check that your OpenAI or Google account has it enabled. Try a simpler prompt if content filters might be triggered.
Image node model shows Unavailable: The Flow was saved with a model Ritemark no longer offers. Open the Image node and choose a replacement in the Model field.
Claude Code node fails: Make sure Claude Code works in the AI sidebar. The node uses the same bundled Claude Code and the same sign-in, so check that Settings -> Claude Account shows it as connected.
Nodes won't connect: Drag from output handles (right side) to input handles (left side). Not all node types can connect to each other.
Quick Reference
| Action | How |
|---|---|
| Create new flow | Flows panel > New Flow |
| Add node | Drag from palette to canvas |
| Connect nodes | Drag output handle to input handle |
| Configure node | Click node, edit in right panel |
| Pick an image provider and model | Image node settings: OpenAI or Google Gemini, then the Model field |
| Run flow | Click Run Flow button |
| Undo/Redo | Cmd+Z / Cmd+Shift+Z |
| Delete node | Select and press Delete |
| Auto-arrange | Click Auto-arrange button |
Need Help?
If you run into issues with Flows, check that your API keys are configured correctly (OpenAI or Google AI for LLM/Image nodes, your Claude sign-in or Anthropic key for Claude Code). For detailed Claude Code setup, see the Claude Code Node guide. For other problems, visit our troubleshooting guide or reach out via the feedback form in the app.
Happy automating!