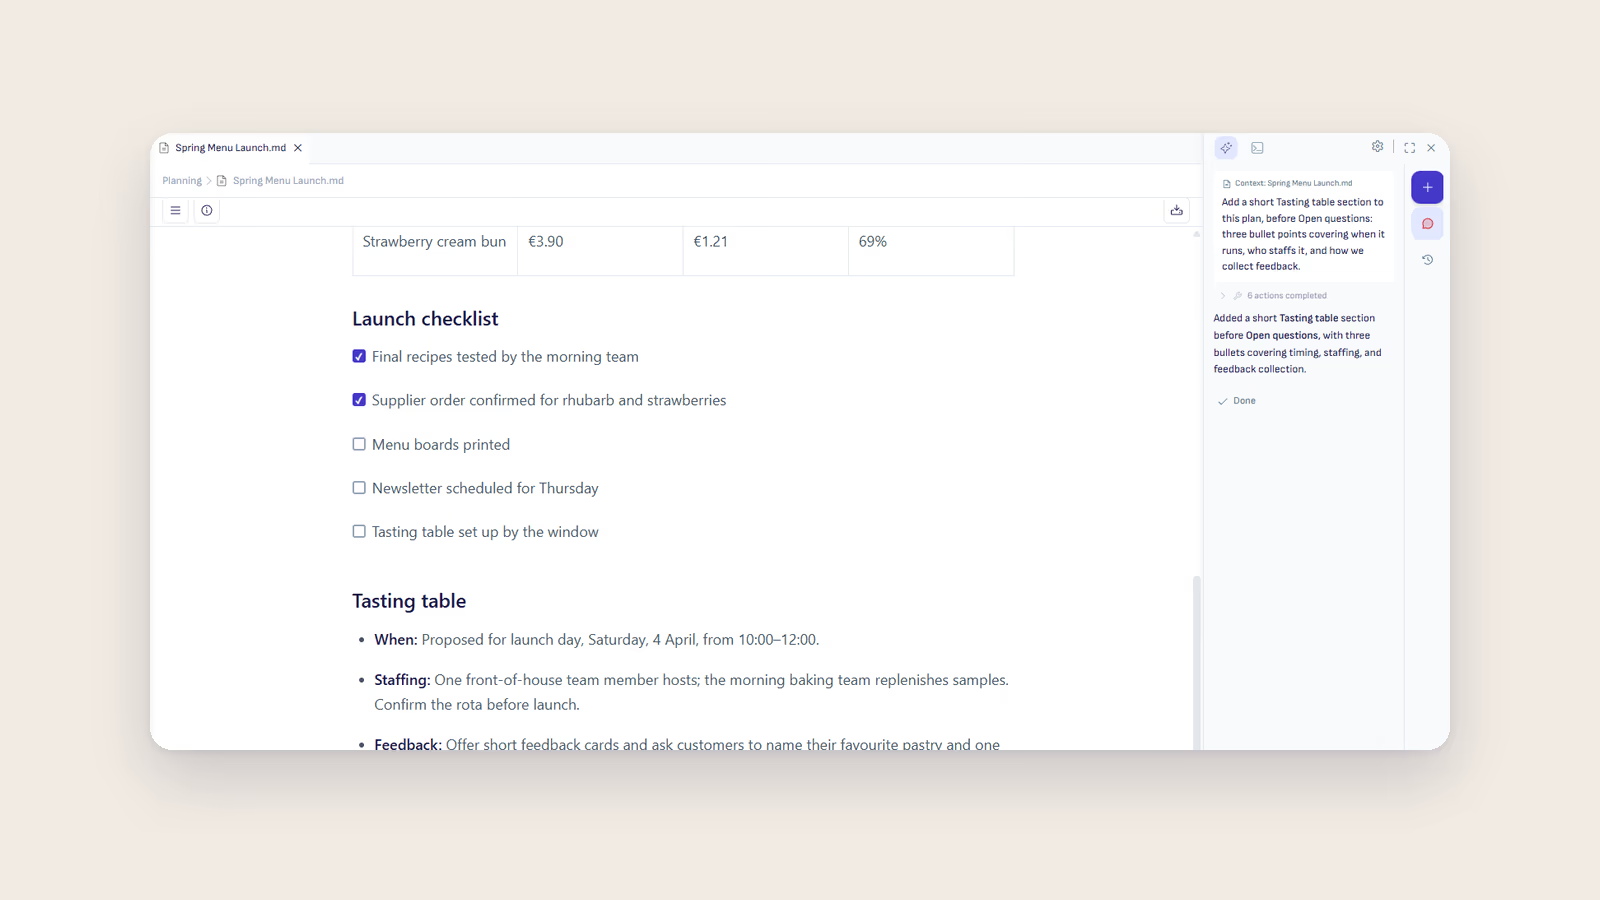
This guide takes you from zero to making your first AI-powered document edit in under 10 minutes. You will download Ritemark, create a document, set up Claude Code in the AI sidebar, and use AI to edit your writing directly inside the app.
Step 1: Download and Install Ritemark
On a Mac, go to the Ritemark releases page and download the DMG for your computer, Apple Silicon or Intel. On Windows, open Ritemark in the Microsoft Store.
On a Mac, open the downloaded DMG file and drag Ritemark to your Applications folder. On Windows, install it from the Store. That is the entire installation.
When you first launch Ritemark, macOS may show a security prompt. Click "Open" to proceed. Ritemark is signed and notarized by Apple, so your Mac has verified it is safe.
Step 2: Create Your First Document
Launch Ritemark. You will see a clean interface with three areas: a file browser on the left, the writing area in the center and the AI sidebar where you talk to the agent. A terminal panel is also available if you want it.
Click "Open Folder" to choose a folder for your writing projects. If you do not have one, create a new folder called "writing" in your Documents directory.
Create a new markdown file by clicking the new file button. Name it my-first-document.md. Start typing in the editor area. You will see your text formatted in real time: headings appear larger, bold text appears bold, and lists are properly indented.
Try typing some markdown:
# My First Document

This is my first document in Ritemark. I am going to use **AI** to improve it.

## Things I Want to Write About

- Technical documentation
- Blog posts
- Project notes
Your text appears formatted as you type. The underlying file is plain markdown that works with any other editor.
Step 3: Set Up the AI
Now for the AI part. Open the AI sidebar on the right. The first time, it opens on a welcome screen that offers the sign-in for Claude; later you switch agents in the model menu under the message box. Claude Code is already inside Ritemark, so there is nothing to install.
Follow the setup steps in the sidebar. Click Sign in with Claude.ai and approve the sign-in in your browser, or choose Use API key instead and paste an Anthropic API key.
You need a paid Claude plan or an Anthropic API key. If you have a ChatGPT account instead, pick Codex and sign in with ChatGPT. OpenCode works with your own API keys.
Step 4: Make Your First AI Edit
With Claude connected and your document open, tell Claude what to do. In the AI sidebar, type:
Read my-first-document.md and expand it into a proper article. Add an engaging introduction, develop each bullet point into a paragraph, and write a conclusion.
Claude reads your file and writes the expanded content into it. Your Ritemark editor updates to show the new content. The agent works in Auto mode by default. Switch to Manual if you want it to ask before each change, or to Plan only to see its plan first.
Congratulations. You just made your first AI-powered edit without copy-pasting a single character.
Step 5: Try More AI Operations
Now that everything is set up, try these common tasks in the AI sidebar:
Fix grammar and improve writing:
Proofread my-first-document.md. Fix grammar, improve sentence flow, and make the writing more concise.
Translate to another language:
Translate my-first-document.md to Estonian. Save as my-first-document-et.md.
Generate a new document:
Create a README.md for a project called 'garden-tracker'. Include installation instructions, usage examples, and a contribution guide.
Ask questions about your writing:
Read my-first-document.md and suggest 5 ways to make it more engaging for technical readers.
Essential Ritemark Features
Now that you have the basics, here are the features you will use daily:
Keyboard shortcuts speed up common actions. Press Cmd+N for a new file, Cmd+S to save, and Cmd+B to toggle bold text. View all shortcuts in the support article on keyboard shortcuts.
The visual editor shows formatting as you type, so there is no separate preview to open.
File browser on the left panel lets you navigate between documents quickly. Click any markdown file to open it in the editor.
Terminal panel can be resized by dragging its top edge. Collapse it when you want a full-screen writing experience and expand it when you need a command line.
What to Do Next
With Ritemark and Claude Code set up, explore these workflows:
- Write a blog post - Draft in Ritemark, polish with Claude Code
- Translate content - Create multilingual versions of your documents
- Document a project - Generate README files and API docs from your code
- Batch edit - Update formatting or content across multiple files at once
Check out our support articles on AI writing workflows and Claude Code integration for detailed guides on each workflow.
Frequently Asked Questions
Do I need Claude Code to use Ritemark?
No. Ritemark works as a standalone markdown editor without any AI tools installed. Claude Code is optional but recommended for AI-assisted writing.
What if I do not have an Anthropic account?
You can still use Ritemark for writing. When you are ready for AI features, get a paid Claude plan or an Anthropic API key at anthropic.com and follow Step 3 above. With a ChatGPT account you can use Codex instead.
How much does Claude Code cost?
Claude Code runs on a paid Claude plan, which is a monthly subscription, or on an Anthropic API key billed by usage. Ritemark itself is free.
Can I use Ritemark with other AI tools?
Yes. The AI sidebar also offers Codex (with your ChatGPT account) and OpenCode (with your own OpenAI, Google, Anthropic or OpenRouter keys). The built-in terminal can run other command-line tools you install yourself, but they are not part of the AI sidebar. See our guide on setting up AI agents for details on each option.
What happens if I close the terminal?
Your documents are saved independently of the terminal. Closing or collapsing the terminal panel does not affect your files. When you reopen the terminal, it starts a new session in your project folder.