
Getting Started with RiteMark
You're about to meet your new favorite writing tool. In just 5 minutes, you'll have RiteMark installed and your first document created.
Let's go.
Download and Install
Head over to our GitHub releases page and download the installer for your platform. RiteMark is available for macOS (Apple Silicon and Intel) as a DMG and for Windows as Ritemark-Setup.exe.
On macOS, open the DMG and drag RiteMark to your Applications folder. On Windows, run Ritemark-Setup.exe and follow the installer prompts. That's it -- installation done.
💡 Tip: After dragging, you can eject the disk image by right-clicking it and selecting "Eject".
First Launch on macOS
When you open RiteMark for the first time, macOS might show a security warning. This happens because we're an independent developer, not a big corporation.
Here's how to open it anyway:
-
Find RiteMark in your Applications folder
-
Right-click (or Control-click) on it
-
Select Open from the menu
-
Click Open in the dialog that appears
You only need to do this once. After that, RiteMark opens like any other app.
Opening a Markdown File Right Away (v1.8.6)
You don't have to open the app first. Double-click any .md file on a fresh install and it opens straight in the Ritemark editor, formatted and ready to type in. There is no "do you trust the authors of the files in this folder?" dialog, no plain-text code view, and no Restricted Mode banner across the top.
If you installed an earlier version and got stuck with that dialog or a permanent Restricted Mode banner, update to v1.8.6. Affected profiles repair themselves on the first launch after the update.
First Launch on Windows
When you run the Ritemark installer for the first time, Windows SmartScreen may show a blue "Windows protected your PC" warning. This happens because Ritemark is a new application and hasn't built up enough download history with Microsoft yet — it's not a security issue.
To get past it, click More info on the warning screen, then click Run anyway. The installer will launch normally. You only see this once.
For a detailed walkthrough with screenshots, see Windows SmartScreen Warning.
Open Your First Folder
RiteMark works with folders, not individual files. One folder holds your documents, and the sidebar shows all of them in one place. Folder is the only word Ritemark uses for this, so there is nothing to learn about workspaces or projects.
Home Is the First Thing in the Sidebar (v1.8.6)
Home sits at the top of the activity bar on the left and stays there. Click it any time and you get one panel with everything you need to start or resume:
-
New document as the big primary button
-
Quick actions for New AI task, Open document, New table, and Open folder
-
Recent documents, so a file you had open yesterday is one click away. With nothing open yet, this list shows recent folders instead
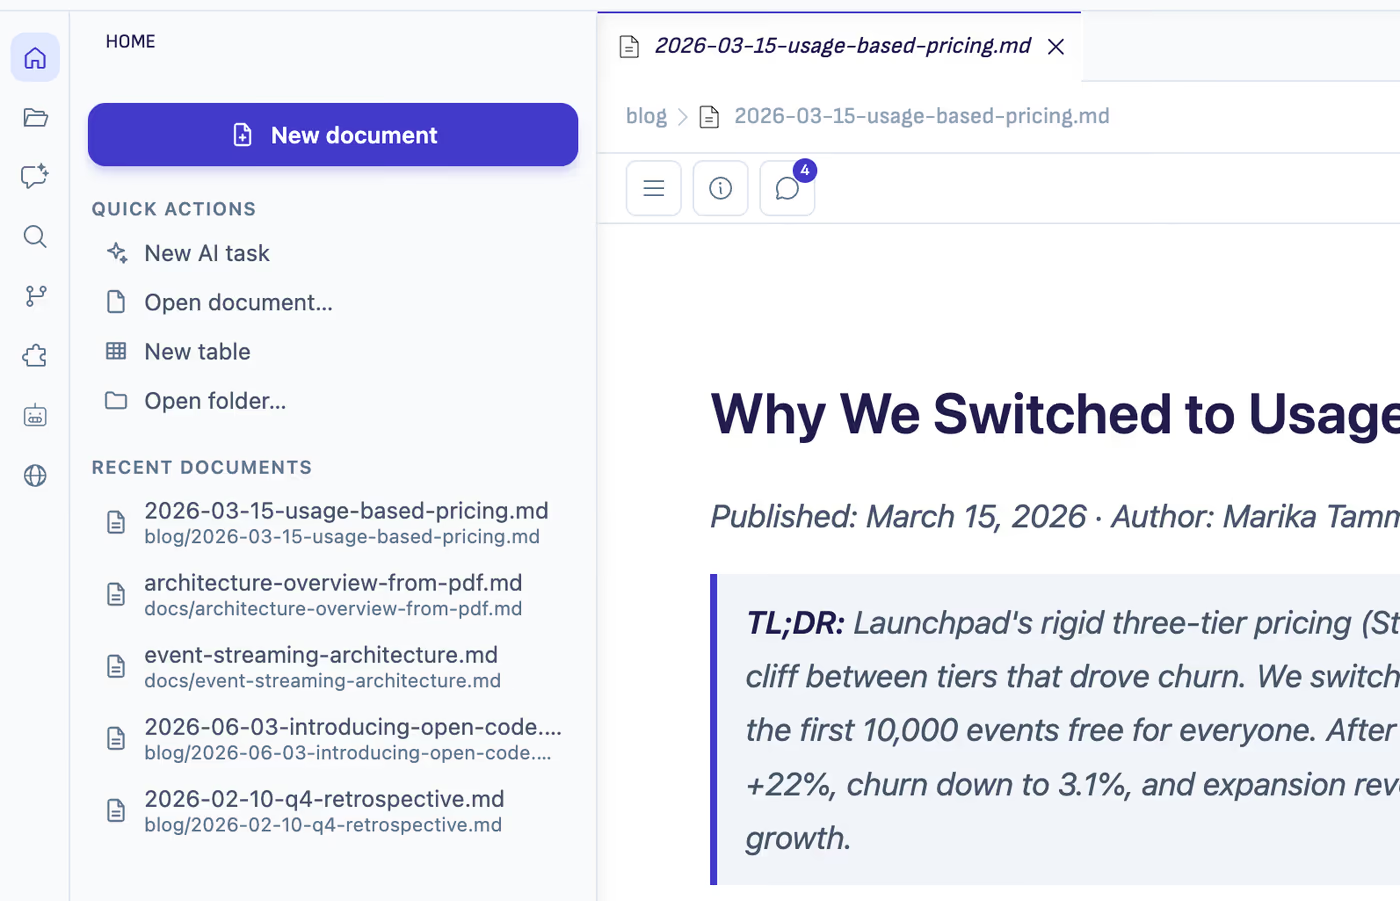
Click Open folder... and select any folder on your computer. If you don't have one ready, create a new folder called "My Notes" or similar. Your folder now appears in the sidebar, and the file tree is where you move around it.
Create Your First Document
Here's the fun part. Press ⌘N, or click New document on Home, or use File -> New Document. Name it something like hello.md and press Enter. File -> New Table does the same for a spreadsheet.
The file opens in the editor. Start typing — your text appears beautifully formatted as you write.
🎉 Congratulations! You've just created your first RiteMark document.
Three Things to Try Right Now
1. Slash Commands
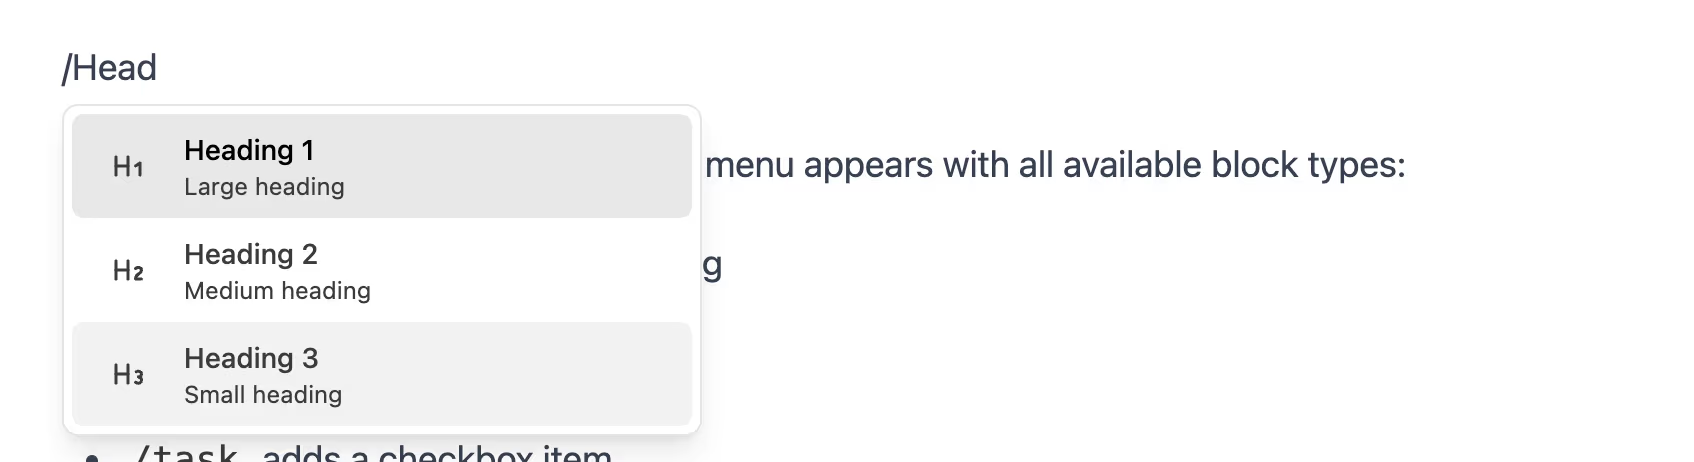 Screenshot of usage of slash commands
Type / anywhere in your document. A menu appears with all available block types:
-
/heading1creates a large heading -
/bulletstarts a bullet list -
/taskadds a checkbox item
Try typing /heading1 and pressing Enter. Magic.
2. Quick Formatting
Select any text you've written. A floating toolbar appears with formatting options. Click B for bold or I for italic.
Even faster? Use keyboard shortcuts: ⌘B for bold, ⌘I for italic.
3. Relax — It Auto-Saves
Notice there's no save button? RiteMark saves your work automatically, about a second after you stop typing. The status bar at the bottom shows you when the file was last saved.
No more lost work. No more "did I save that?" anxiety.
What's Next?
You've got the basics down. Here's where to go from here:
Set up AI assistant — RiteMark includes a simple AI assistant that can help you write, edit, and brainstorm. Configure your API key to unlock it.
Explore the editor — Learn about all the block types and keyboard shortcuts to speed up your workflow.
Export your work -- Share your markdown as PDF, Word, or HTML. See export options.
Open web pages alongside your writing -- As of v1.7.0, .html files, external URLs, and localhost:* open as rendered pages in the same tab bar as your markdown. It's a real browser inside Ritemark, useful for previewing exports, checking references, or running a local docs server.
Check for updates -- The new Update Center in Settings lets you check for updates, install them with pause and resume support, and skip versions you don't want. No more downloading DMGs manually for most updates.
Quick Reference
| What you want to do | How to do it |
|---|---|
| Create a new document | Press ⌘N, or click New document on Home |
| Create a new table | File → New Table, or New table on Home |
| Open a folder | Open folder... on Home, or File → Open Folder |
| Reopen something you worked on | Recent documents on Home |
| Insert a heading | Type /heading1 |
| Make text bold | Select text, press ⌘B |
| Start a bullet list | Type /bullet |
| Export to PDF | Click Export → PDF |
Stuck?
Check out Common Issues for solutions to frequent problems, or browse the full support documentation for detailed guides on every feature.
Happy writing!