
The Agent Library is a panel in the Ritemark activity bar that finds your AI agents, skills, commands, and project instructions across .claude/, .agents/, AGENTS.md, and CLAUDE.md files, then lets you open them, create new ones, duplicate existing ones, and start a chat with any agent in one click.
If you write Claude Code agents or OpenAI Codex skills, this is where they live now.
As of v1.7.3, the library is organized into five collapsible sections — Instructions, Agents, Skills, Commands, and Flows — and opening any agent file flips the right side of the screen into the visual Agent Configurator. House rules are now clearly separated from configurable team members, and you can edit an agent's model, tools allow-list, and skills without writing a line of YAML.
What It Scans
The library scans three things, automatically, when a folder opens and on refresh:
.claude/agents/,.claude/skills/,.claude/commands/at the root of the open folder and in your home directory (~/.claude/).agents/directory at the root of the open folder, for OpenAI/Codex layoutAGENTS.mdandCLAUDE.mdat the root of the open folder, surfaced in the Instructions section as folder-wide rules
Folder-scoped and user-scoped entries are grouped separately, so you always know whether a helper belongs to one folder or applies to everything you do.
Each row shows the name and description from frontmatter. If a helper has no description, the row marks it as missing — a hint that the frontmatter could use a quick cleanup.
As of v1.7.0, the library preserves branded casing for known agent names. So "UX Expert", "PR Reviewer", "QA Validator", and "VS Code Expert" appear with their proper casing in the row label, even if the underlying slug uses lowercase.
The Five Sections (v1.7.3)
Everything AI-related appears under one of five collapsible sections. The collapse state is remembered, so you can keep open only the ones you actually work with.
| Section | What it holds |
|---|---|
| Instructions | CLAUDE.md / AGENTS.md — folder-wide rules loaded into every AI session |
| Agents | Your custom agents from .claude/agents/ |
| Skills | Reusable workflows (.claude/skills/, plus Codex skills under .agents/skills/) |
| Commands | Slash commands (.claude/commands/) |
| Flows | Visual AI workflows (.ritemark/flows/) |
Instructions files are intentionally separated from Agents. CLAUDE.md and AGENTS.md are not configurable assistants — they are house rules loaded into every session — which is why they appear in their own section and do not get an Agent Configurator panel.
Creating New Agents and Skills
The empty state shows two buttons: New skill and New agent. Either button scaffolds a fresh markdown file with the right frontmatter, opens it in the editor, and you start writing.
Once the library has at least one entry, the buttons move to a + affordance on each section header. The + next to "Agents" creates an agent. The + next to "Skills" creates a skill. The intent comes from where you click.
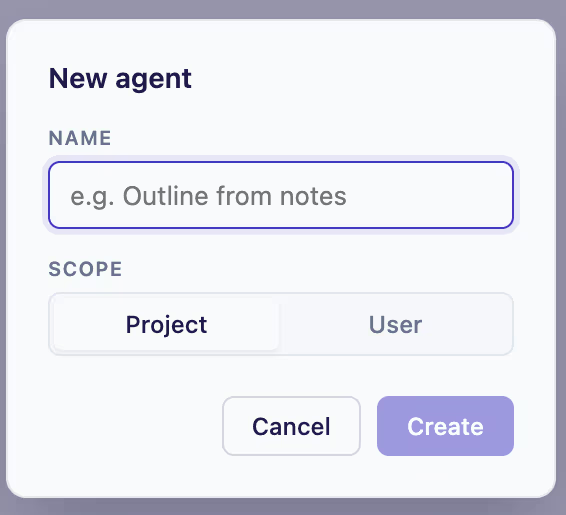
The file gets created in the right scope (folder or user, depending on which section you used) with starter frontmatter that includes name, description, icon, and color.
Forking with Duplicate
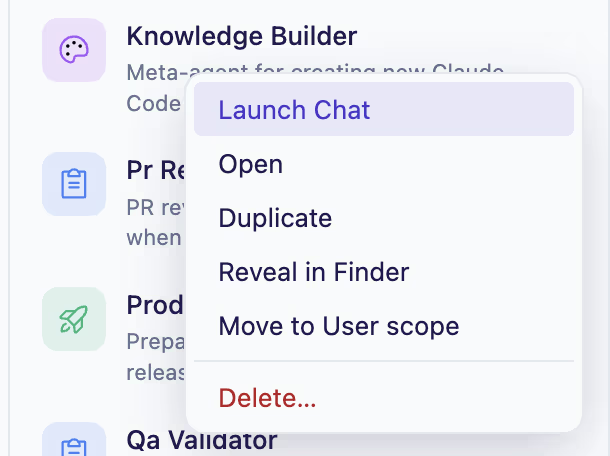
Right-click any row in the library and you get a context menu with these actions:
- Open - opens the source
.mdfile in the editor - Duplicate - copies the row as a new file you can edit
- Reveal in Finder (macOS) or Reveal in File Explorer (Windows) - shows the file in the OS file manager
- Move scope - moves between folder and user scope
- Delete - removes the file
Duplicate is the primary way to fork. Find a skill that is almost what you need, duplicate it, edit the copy, and you have a new helper that started from something that already worked. This is how you build up a library over time.
Tip: Duplicate keeps the original frontmatter, including the icon and color. Change the name and description first, then iterate on the body.
Launch Chat: Talk to Any Agent
This is the feature most people pick up first. Right-click an agent and choose Launch Chat. The AI panel opens with that agent pinned as hidden context, an indigo chip in the composer shows you which agent is active, and you start typing.
How it works underneath:
- The agent's full instructions are sent once on the first turn
- Subsequent turns get a short reminder, so you do not burn context resending the entire prompt every message
- Switching agents in-thread sends an explicit handoff note so the new agent knows what was happening before it took over
The @mention popup uses the same Pin Agent mechanism. One chip, one source of truth. No "wait, did the @mention actually take effect" guessing.
Agents Across Runtimes
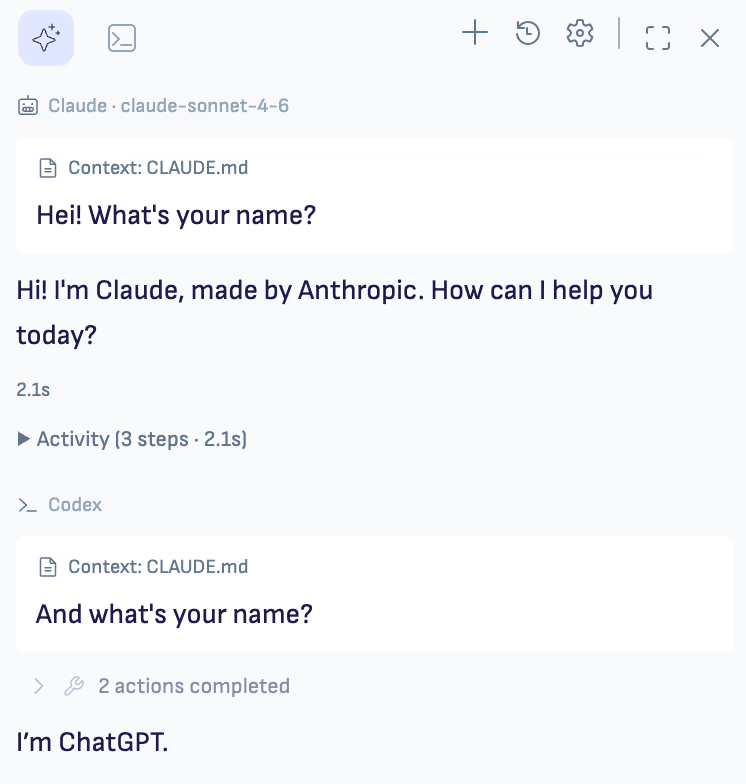
In v1.6.3, conversations are durable across runtimes. You can pin an agent and start with Claude, then switch to Codex on the next turn. Both turns stay in the same thread, with provenance shown on each assistant response (which runtime, which model). The agent context follows the conversation, not the runtime.
The mode is set in the composer. Manual and Auto work the same on every runtime, and Plan only is available for Claude Code and Codex, not OpenCode. See Autonomy and Plan Mode in the AI Sidebar article.
Scheduled Agents and Their Consent (v1.8.6)
Agents that run on a timer get their own SCHEDULED section in the library. It holds the run history for each scheduled task (the last ten runs), and any amber "needs review" row where a run tried to write a file or run a command and stopped to ask.
As of v1.8.6, a folder that defines scheduled agents asks once before anything is armed. Opening the folder does not quietly start a timer. You get one clear question, and until you answer yes, nothing runs on a schedule.
That answer is reversible. Come back to the Agent Library any time to switch scheduling on for a folder you now want running unattended, or off for one you don't. A folder that was already scheduling agents before you updated keeps working as it was, with no new prompt.
Every scheduled run also uses the model pinned on the agent, and a substitution is reported rather than made quietly. Setup details for schedules are in the AI Sidebar article.
Icons and Colors
Every row has a color-coded icon chip (32×32 pixels, eight brand colors, thirty-three Phosphor icons). Icons are auto-assigned from the agent's name and description keywords. A skill called "summarize meeting notes" gets a notes-style icon. A "code reviewer" gets something terminal-flavored.
If the auto-assignment is wrong, override it in frontmatter:
---
name: my-skill
description: What this skill does
icon: notebook
color: indigo
---
Available icons match the Phosphor icon library; available colors are the eight Ritemark brand colors. The library validates the values on parse and falls back to the auto-assignment if either is invalid.
AGENTS.md and .agents/ Support
If you keep your agent definitions in OpenAI/Codex layout instead of Anthropic's .claude/, the library finds them without configuration. AGENTS.md at the root of the open folder is treated as the main agent config for that folder and surfaces in the library alongside skills and commands.
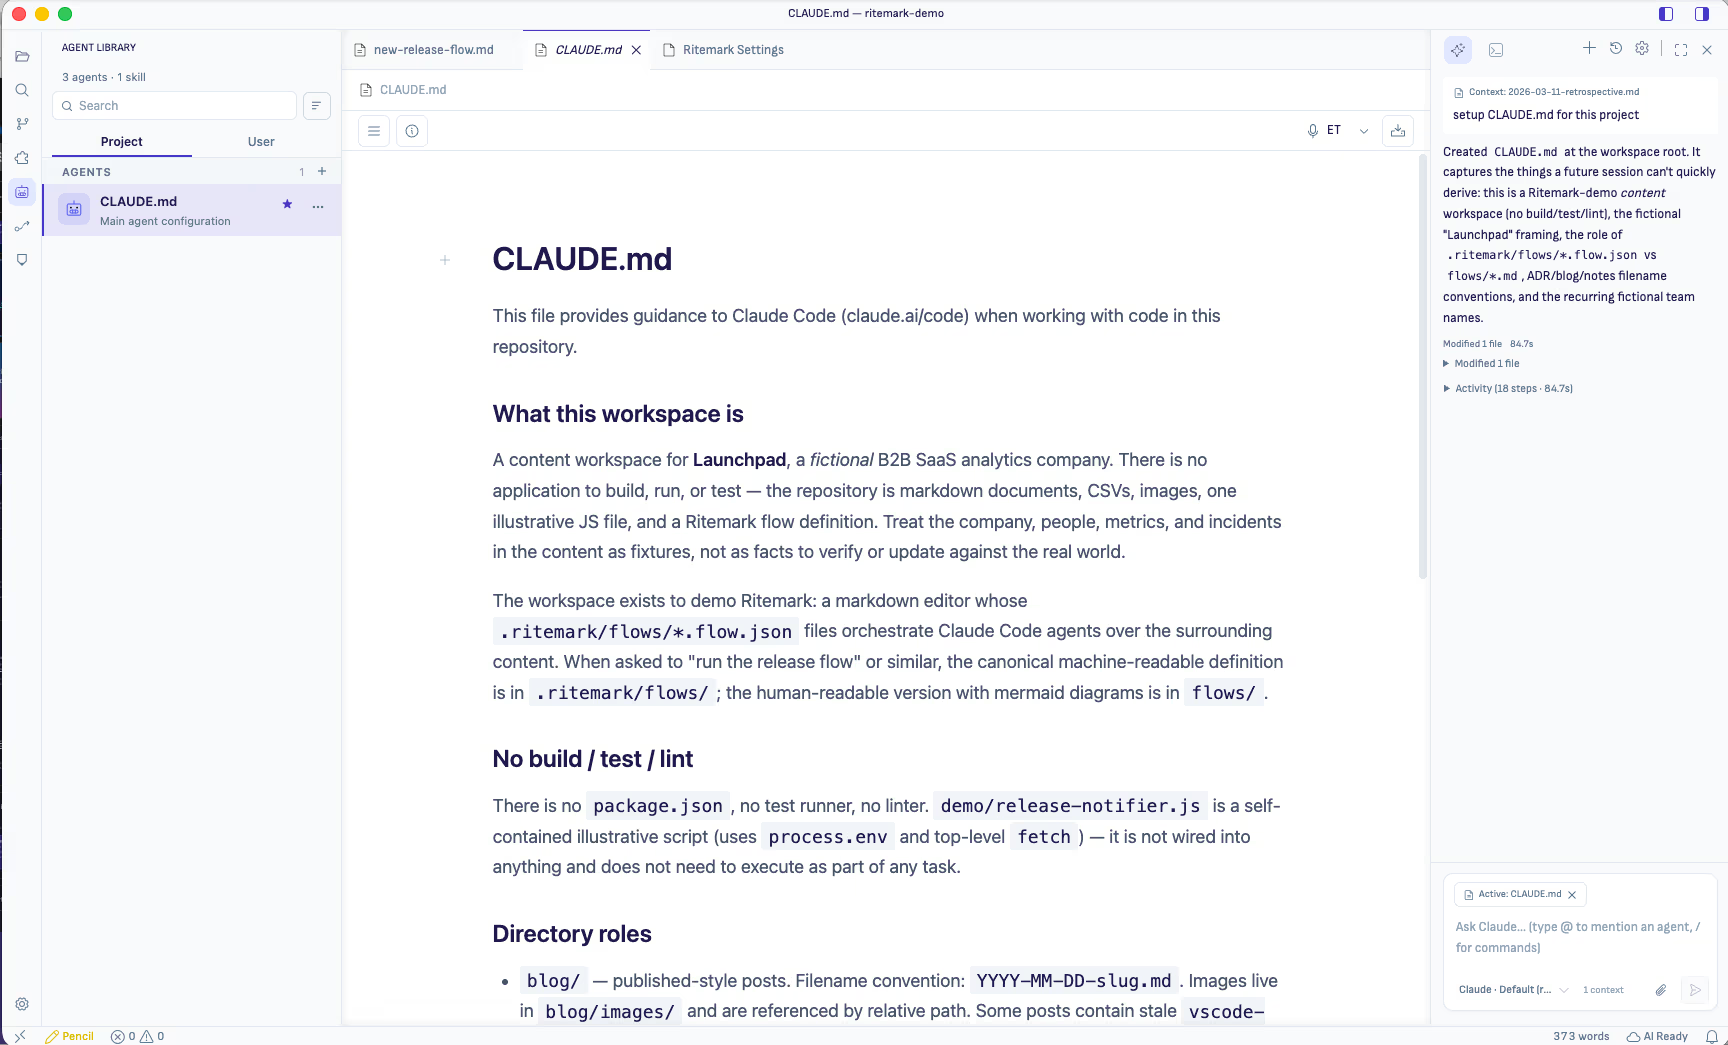
This means you can use Ritemark's library UI even if your team has standardized on the OpenAI conventions instead of Anthropic's.
Starter Pack
If your ~/.claude/ directory is empty on first run, Ritemark seeds four example helpers so the library is not empty out of the box:
- skill-creator (Apache-2.0, originally from Anthropic) - a skill that helps you write other skills
- outline-from-notes - takes raw notes and produces a structured outline
- frontmatter-cleanup - normalizes YAML frontmatter across documents
- document-reviewer - reviews a document for clarity, structure, and tone
Seeding only happens once and never overwrites existing files. If you already have a .claude/ directory, nothing changes.
Quick Reference
| Action | How |
|---|---|
| Create new agent | + next to Agents row, or New agent button when empty |
| Create new skill | + next to Skills row, or New skill button when empty |
| Open source file | Click the row, or right-click then Open |
| Fork an existing helper | Right-click then Duplicate |
| Pin agent for chat | Right-click then Launch Chat |
| Move between folder and user scope | Right-click then Move scope |
| Override icon/color | Add icon: and color: to frontmatter |
| Arm or disarm a folder's scheduled agents (v1.8.6) | Answer the one-time prompt, or change it later in the SCHEDULED section |
| Review a blocked scheduled run | Amber "needs review" row in the SCHEDULED section |
| Refresh library | Refresh button in the panel toolbar |
Frontmatter Reference
Minimum frontmatter for an agent or skill:
---
name: my-agent
description: One-line description of what this agent does
---
Optional fields:
---
name: my-agent
description: One-line description of what this agent does
icon: lightbulb        # any Phosphor icon name
color: indigo          # one of the 8 Ritemark brand colors
---
The frontmatter parser handles CRLF line endings and YAML block scalar syntax (>, >-, |, |-), so agents authored on Windows or with multi-line descriptions parse correctly.
Related
- Agent Configurator - the visual settings panel that opens beside any agent file
- AI Sidebar - the panel where Launch Chat opens
- Setup Claude Code - first-time Claude setup
- Setup OpenCode - add the bring-your-own-key runtime
- Why Terminal Agents - background on the agent model